Notes let you add internal comments or display instructions and guidance in an Input Form without adding the Note text to the inserted output.
Private Notes are visible only when editing the template. Info, Warning, and Alert Notes are displayed in the Input Form with different levels of emphasis.
Note types
PhraseExpander supports one Private Note type and three displayable Note types:
Private note — Adds an internal comment that is visible in the Template Editor but not in the Input Form.
Syntax: {~text~}
Info note — Displays general information or guidance in the Input Form.
Syntax: {~!info text~}
Warning note — Displays an instruction or warning that requires additional attention.
Syntax: {~!warning text~}
Alert note — Displays an important instruction or alert with the highest level of emphasis.
Syntax: {~!alert text~}
None of the Note types are added to the inserted output.
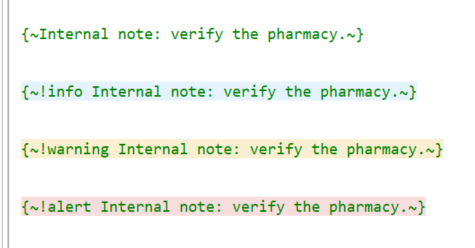
Syntax highlighting distinguishes the four Note types in the Template Editor.
Notes in the Input Form
Info, Warning, and Alert Notes appear in the Input Form in the same order in which they occur in the template.
Place a Note before a field or section to introduce it. Their different formatting helps indicate the importance of the guidance.
A displayable Note appears only when the template contains an Input Form field. A template containing only Notes does not open the Input Form or insert any text.
Private Notes do not appear in the Input Form.
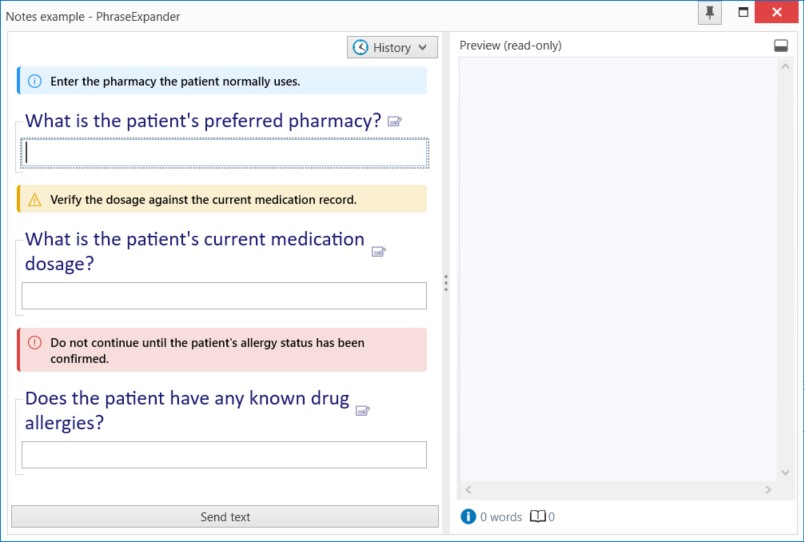
Info, Warning, and Alert Notes display guidance above the relevant Input Form fields.
Using Notes in variables and macros
You can display a Note conditionally by placing it inside an {#if#} branch or a section. The Note appears only when that branch or section is included.
Notes placed inside a variable’s content or a macro’s arguments are treated as Private Notes. They do not appear in the Input Form or inserted output.
NOTE: Note text is static. Variables and macros placed inside a Note remain literal and are not resolved.
Compatibility with earlier versions
Earlier versions of PhraseExpander ignore Notes. This allows templates containing Notes to be used in shared glossaries without adding the Note text to the inserted output.
Adding a Note
Select the text that you want to convert to a Note. If no text is selected, PhraseExpander inserts an empty Note placeholder.
Click the Note  menu on the Template Editor toolbar and select Private note, Info note, Warning note, or Alert note.
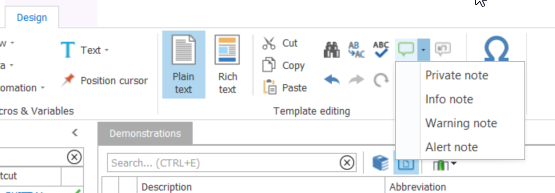
Select a Note type from the Template Editor toolbar.
You can also right-click the selected text, select Notes, and select the required type.
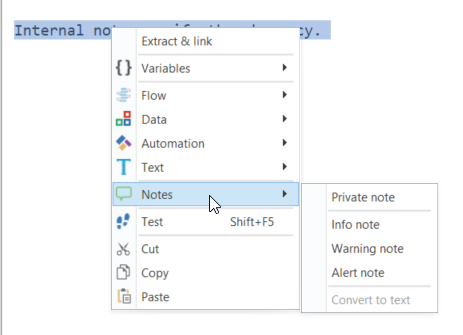
Select a Note type from the right-click context menu.
Alternatively, press CTRL+ALT+D to convert selected text to a Note.
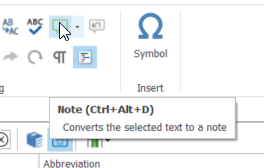
Use CTRL+ALT+D to convert selected text to a Note.
Changing the Note type
Place the cursor inside an existing Note, right-click, and select Notes. A checkmark identifies its current type. Select another type to change it.
Converting a Note to text
Place the cursor inside an existing Note. Click the Convert to text  button on the Template Editor toolbar, or right-click, select Notes, then select Convert to text.
The Note delimiters are removed and its contents are returned to ordinary template text. Alternatively, press CTRL+ALT+U to convert the Note back to ordinary text.
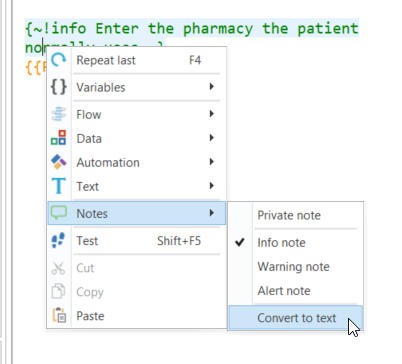
Use Convert to text to remove the Note formatting.